Teams Meetings and Calls Help Center
- Schedule a Meeting
- Join a Teams Meeting
- Participate
- Navigate
- Record
- Download Recordings
- Share Recordings
- Sign Language Interpretation
Schedule
You can schedule a meeting from a chat using the schedule now button to quickly add those you're chatting with.

If you'd like to invite your Team to a meeting, use open a channel and click the meet now video icon

The Calendar tab in Teams can be used to schedule meetings with your Team and guests. Click the calendar tab on the left-hand navigation menu to get started.

- Outlook has a Teams plug-in you can use to schedule Teams meeting. .
Join a Teams Meeting
Watch a Teams meetings tutorial.
When you schedule or are invited to a Teams meeting, you can join from a meeting link, from their calendar, a channel, a chat, or call in.
You can even join without a Teams account.
Participate in a Teams Meeting
- Video: Show your screen during a meeting
- Take meeting notes
- Blur your background
- Adjust your view in a Teams meeting
- Manage audio settings
- Change participant settings
- Whiteboard
- Share system audio
Navigation
Record a Meeting
- Record a meeting
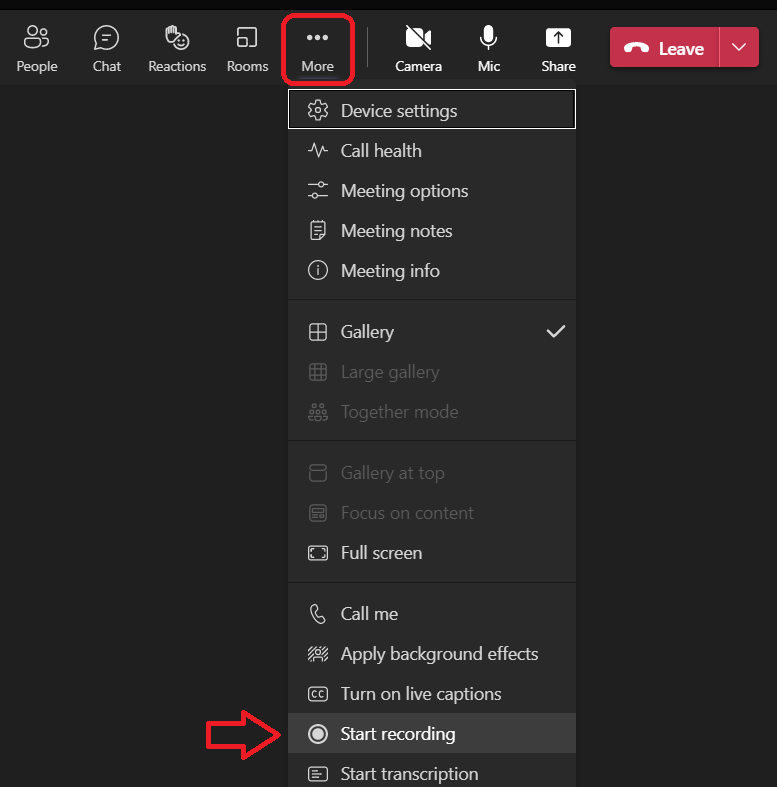
- Open the more options menu in a meeting to start and stop a recording.
- Play and share a meeting recording
- After your recording has ended, you will receive an email that your recording has been processed and is available. You can access the recording in Teams.

- All recordings scheduled in your Team can be found in the Files tab of your Team in the Recordings folder.

- Delete a meeting recording
- Edit a recording transcript
Download Meeting Recordings
After your recording has ended, you will receive an email that your recording has been processed and is available. You can access the recording in the meeting chat from Teams.
The owner will need to download the video to share the recording beyond meeting attendees.
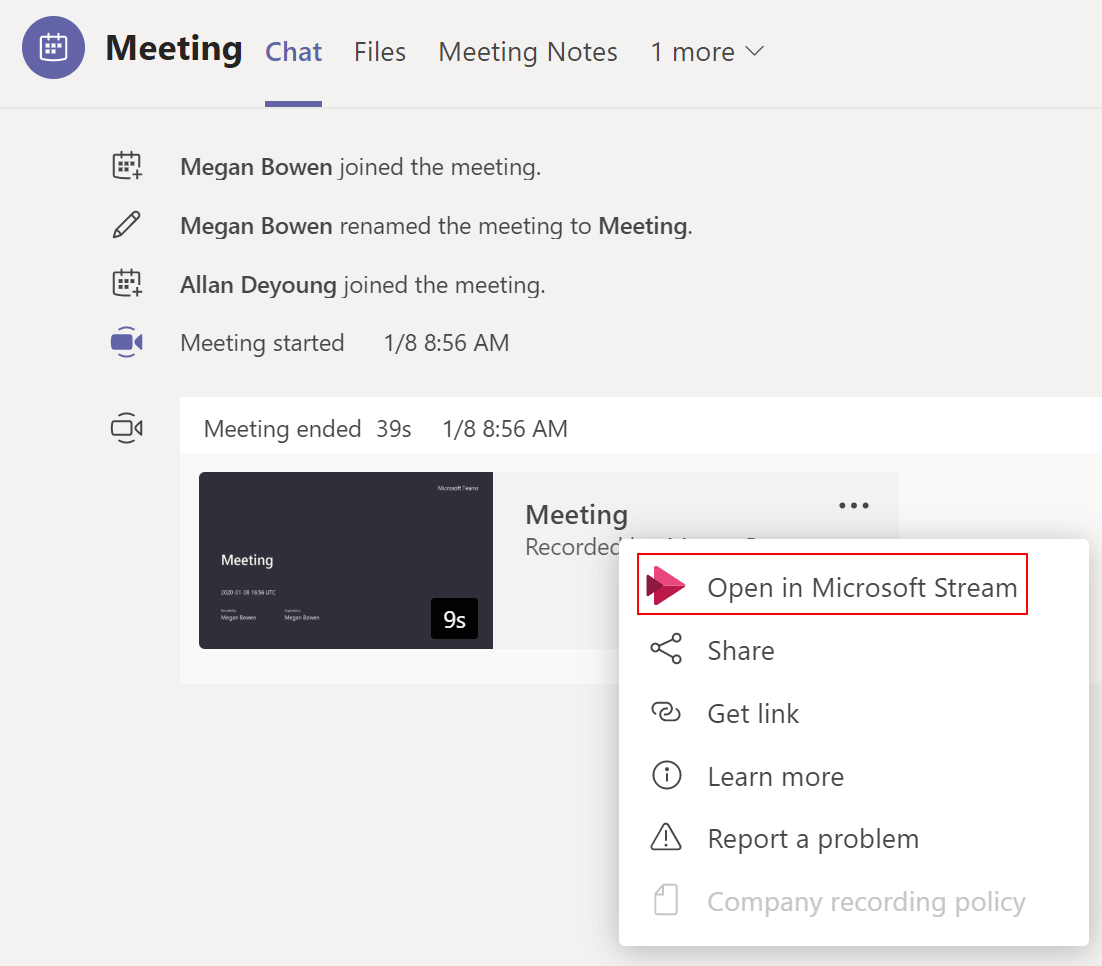
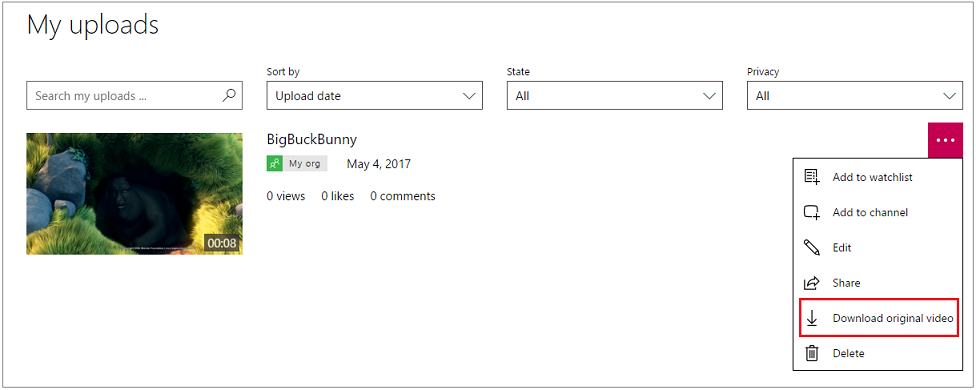
Click the chat tab in the left navigation bar of Teams and find your meeting to open the chat. You should see your video at the end of the history. Open your recording in Microsoft Stream to download and share
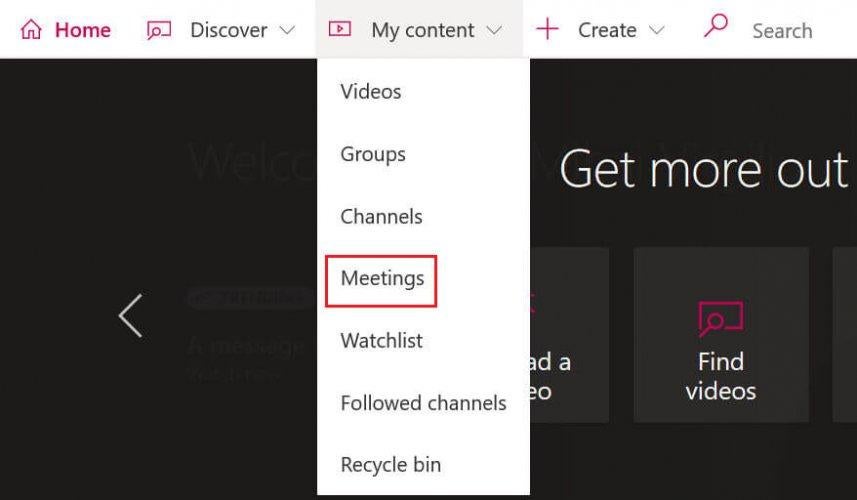
You can also access your recordings by logging into Microsoft Stream and opening Meetings from the menu bar
Select your video and click the More options icon '...' and select download original video
Read more on how to play and share meeting recordings in Teams.
Share Meeting Recordings
After your recording has ended, you will receive an email that your recording has been processed and is available. You can access the recording in the meeting chat from Teams.
Click the chat tab in the left navigation bar of Teams and find your meeting to open the chat. You should see your video at the end of the history.

Click on the more options menu next to the video you want to share and select update video details
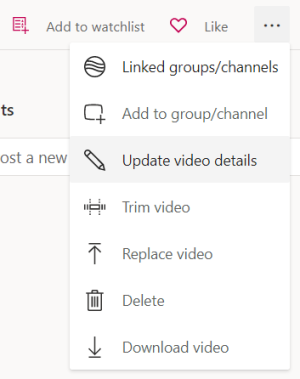
Share your video with specific people or groups at UT Austin in the permissions tab.
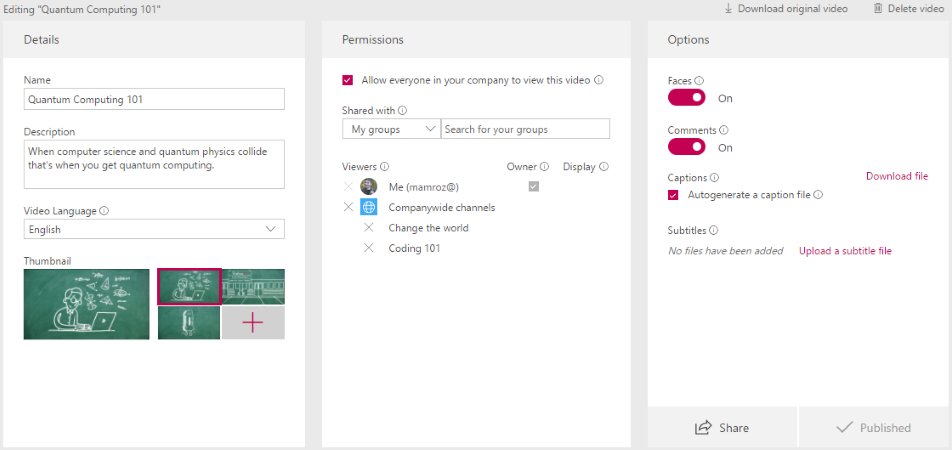
If you organized or participated in the meeting, you can also find it on Microsoft Stream. Login to Stream and select My Content > Videos. The owner will need to give permission or download the video to share the recording beyond meeting attendees.
Read more on how to play and share meeting recordings in Teams.
Sign Language Interpretation
Viewers in Teams can designate their own sign language interpreters.
To enable the sign language interpreter view in meetings:
Click More "..." > Accessibility > Manage Preferred Signers
Start typing the name of the interpreter and select the interpreter from the list of search results
Click Save when ready
If you work with interpreters from outside your organization, or in any situation where you need to work with an interpreter not on your preferred signers list, you can prioritize any other meeting participant for sign language from the Participants list or participant context menu
Note: The options mentioned in the steps below are only available if you've turned on the Sign Language option in the Accessibility tab in the app settings.
To add a signer from the participant list, select People. In the list of the meeting participants, find the person you want to assign as a signer, and then select (More options) > Make a signer.
To add a signer from the participant context menu, select (More options) next to the participant's name in their video, and then select Make a signer.
If you want to designate a signer for the entire meeting to view prominently, use the Spotlight feature by clicking on the “…” next to the interpreter’s name in the Participants window and click Spotlight for Everyone.
|
Check out the latest post on the Microsoft blog or find out about new tools and features. |
||
| Microsoft 365 Blog | ||

